


I have been using Figma for years, and I’ve discovered some incredible plugins that have significantly improved my workflow and designs. These plugins have been carefully selected based on various scenarios where they proved invaluable in my creative processes. I believe they can do the same for you as well.
Here, I’ll share a list of these essential plugins and explain how each can benefit your design work, no matter the project.
Clean Document: As designers, we tend to create many instances and iterations when designing, leaving our design boards messy and unorganized. The Clean Document plugin on Figma, created by Yuan Qing Lim, simplifies this process by automatically organizing your Figma documents. To use this plugin, select a frame on your design board and use the plugin to clean and organize your workspace. You’ll be amazed by the results.
How to use the clean document plugins: On the top left navigation on Figma, select the resources icon and search for the clean document to launch the plugin. Make sure a frame is selected. Try Plugin

When the plugin launches, showing a list of different options to select from based on your preference.
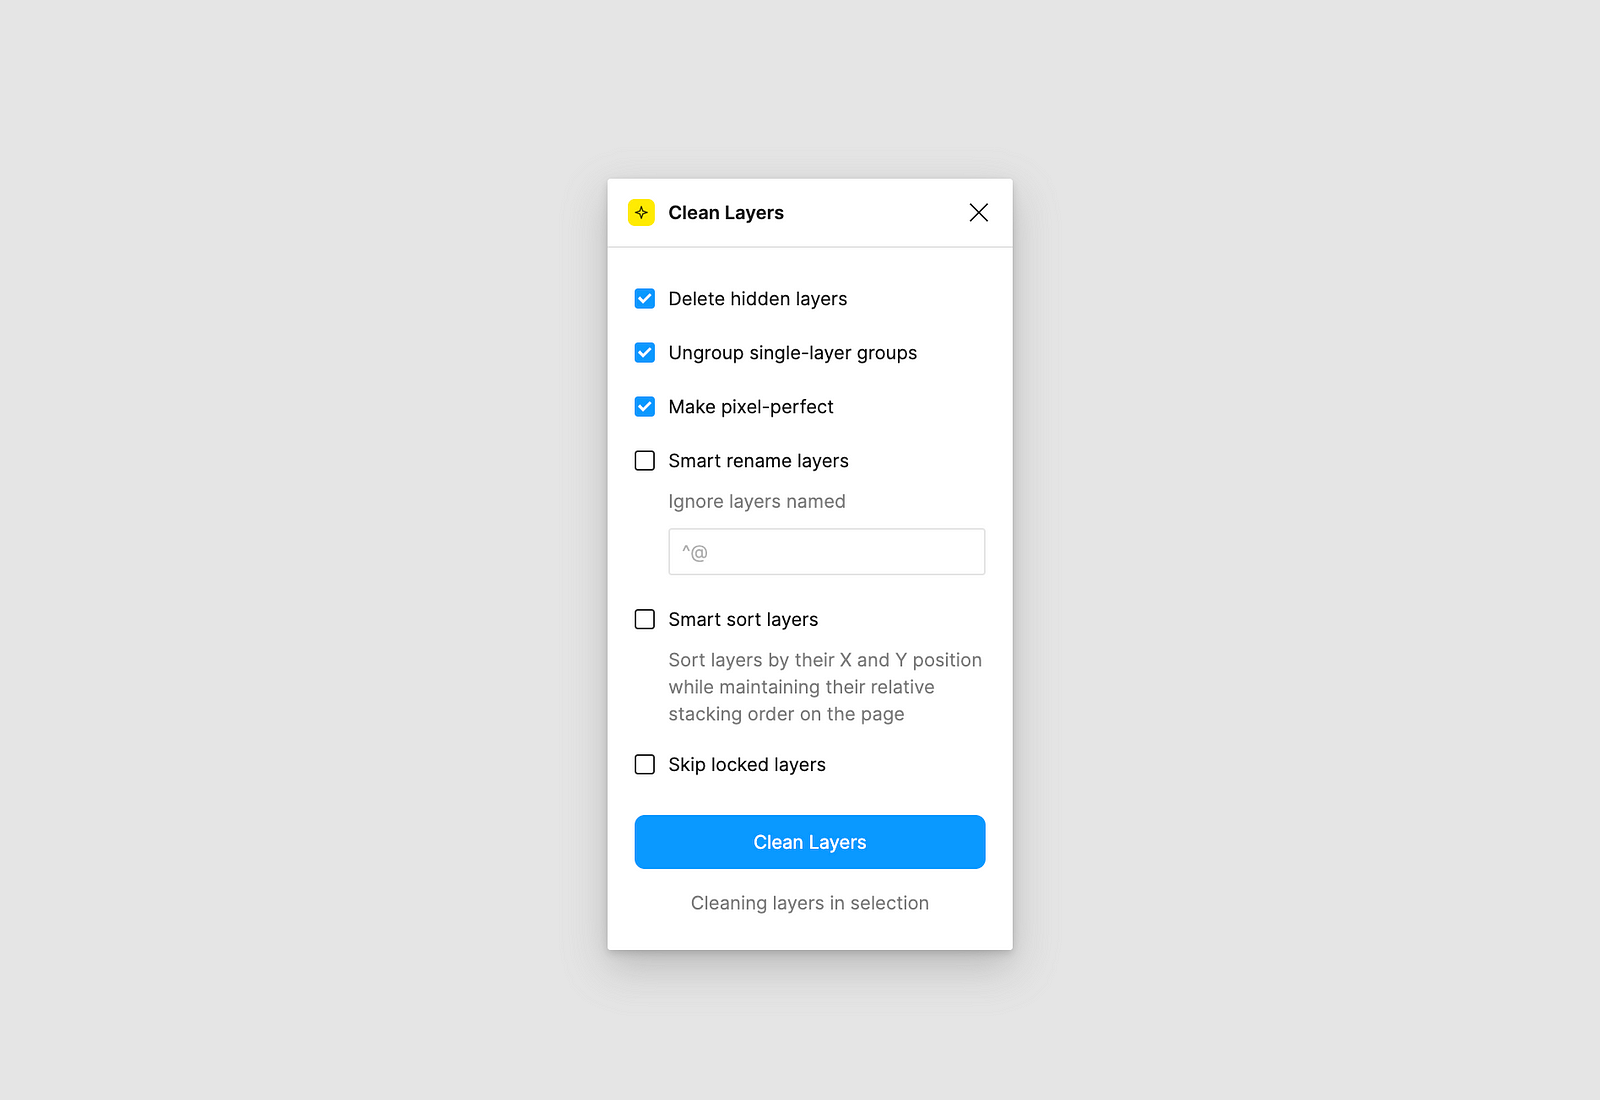
Delete hidden layers: This lets you delete all hidden layers within the selection or on the current page.
Ungroup single-layer groups: These ungroup single-layer groups within the selection or on the current page.
Make pixel-perfect: It rounds the X and Y position and dimensions of layers within the selection or on the current page to the nearest pixel.
Smart rename layers: It automatically renames layers within the selection or on the current page.
Smart sort layers: It sorts layers within the selection or on the current page by their X and Y position while maintaining their relative stacking order on the page.
Skip locked layers: When the ‘Skip locked layers’ option is unselected, no changes will be made to the locked layers.
Clean layers button: Run all the above commands on layers within the selection or on the current page.
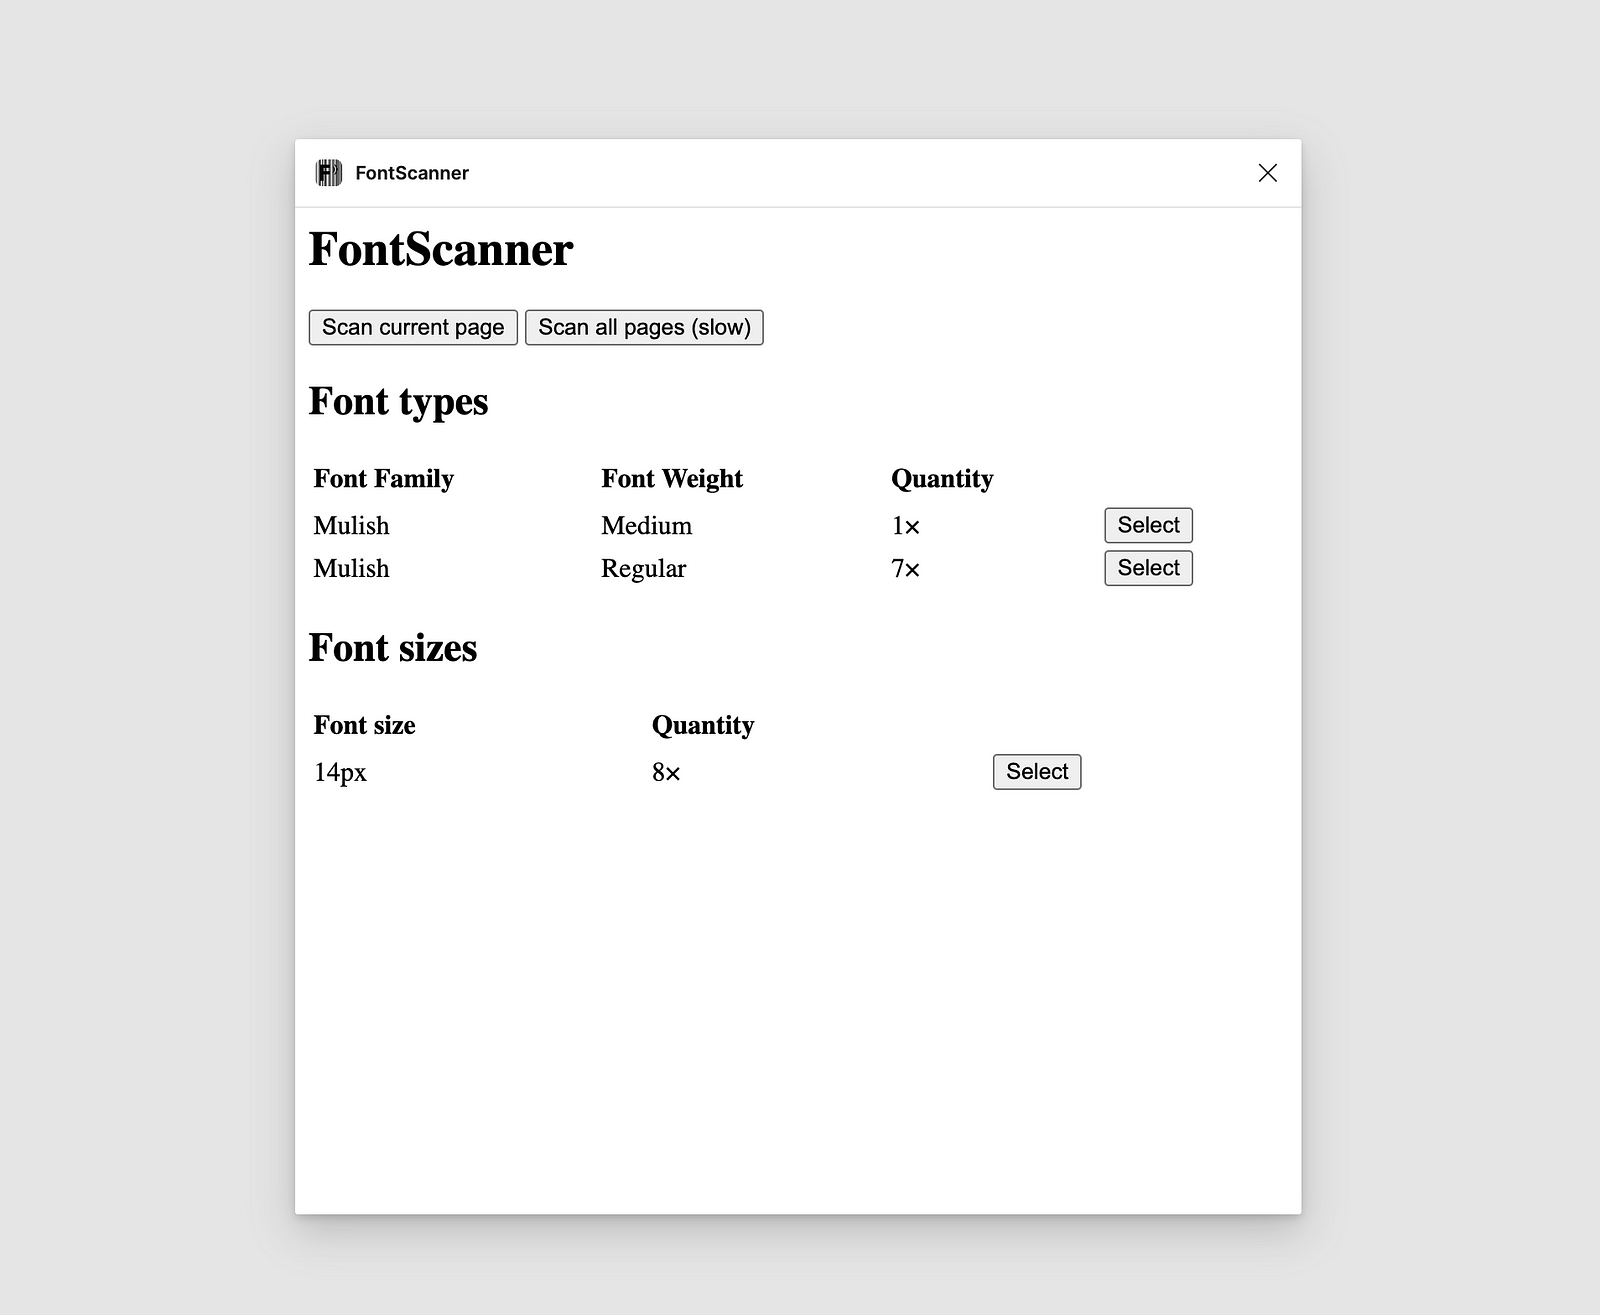
Font Scanner: Created by Honzik Kryspin, this tool scans and identifies all the fonts in your design. You can scan fonts on the current page or across multiple pages within your Figma file. With the font scanner, you can select text in Figma to check the font family, weight, or size. This tool is good when working on large projects where managing multiple fonts is challenging. It helps you list all the fonts used and easily replace any that shouldn’t be in the design. Try Plugin
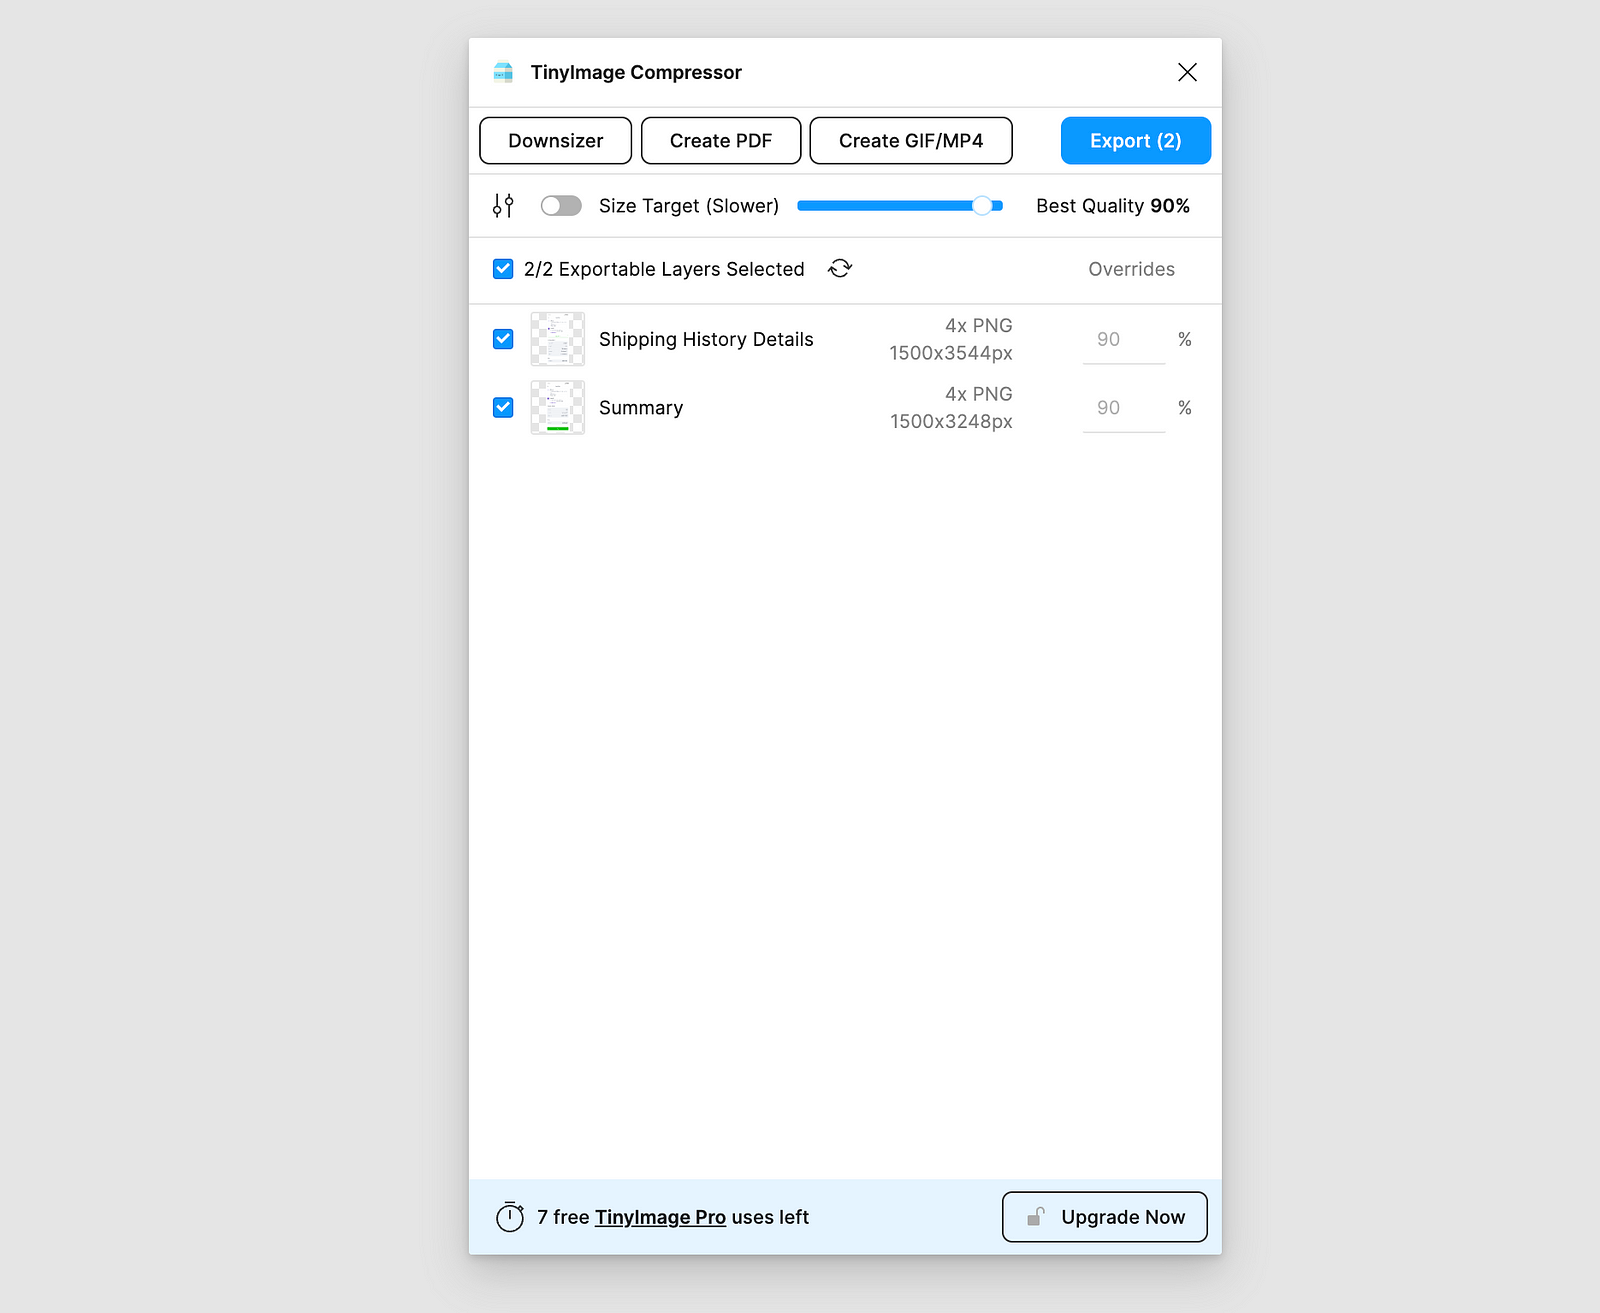
TinyImage Compressor: This plugin created by Hypermatic allows you to compress your PNG and JPG images easily. It also creates GIFs or MP4s with your Figma designs. To use this plugin, first select a frame or image. Then, adjust the settings to your preference. After you finish editing the settings, click the export button. Then, the image will be exported and saved to your local computer. The plugin has about ten usage free trials, and after that is exhausted, it requires you to make a payment. Try Plugin
Lazy Load: Lazy load created by Manik Chugh allows you to generate skeleton loading screens with just one click. This feature is great for scenarios where developers need a loading state for created design screens. Instead of designing one from scratch, this plugin enables you to generate it, saving you considerable time. To use this plugin on Figma, click the resources icon on the top left navigation, search for ‘Lazy load’, and select a frame before launching the plugin. Try plugin

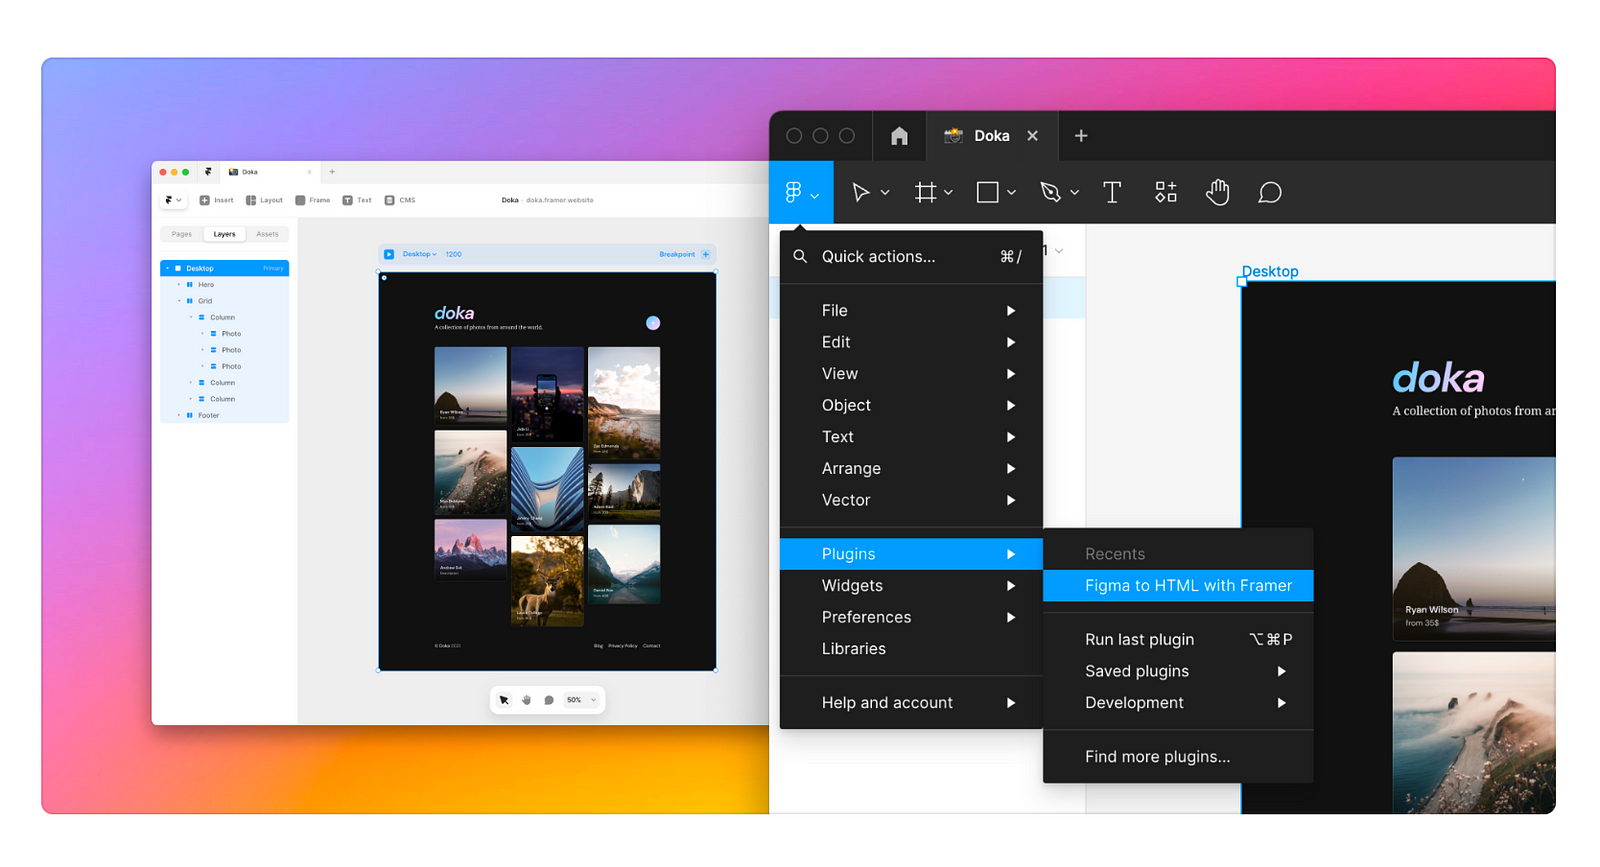
Figma to HTML in Framer: Created by Framer, this plugin lets you copy your designs from Figma and paste them into Framer. To use it, click the resource icon, select plugins, and search for ‘Figma to HTML in Framer.’ After selecting it, the plugin copies all the frames (elements) from your Figma board, which you can paste into Framer. It simplifies workflow when transferring designs from Figma to Framer. Try Plugin
Brands logo: The Brands logo plugin created by Andrey Kovalev provides easy access to high-quality SVG logos of various companies directly in your Figma designs. To use this plugin, search for Brands Logo on Figma, launch the plugin, and browse from the vast collection of company logos. If you click on your preferred logo, it will automatically show on your Figma board. Try plugin
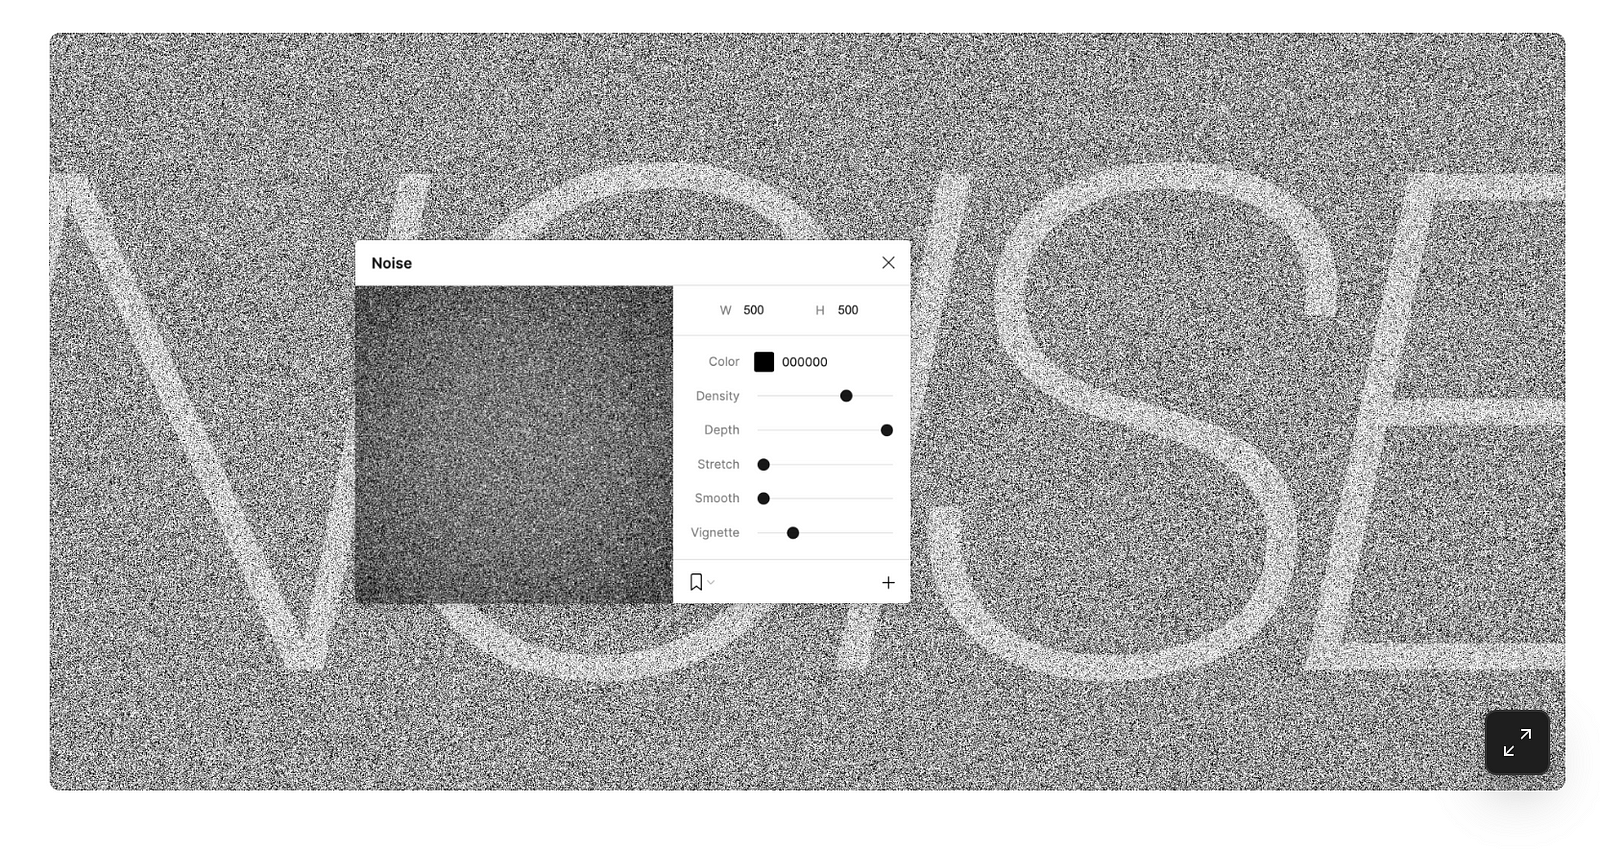
Noise: The noise logo plugin created by Dustin Mierau is a great tool designers can use to add texture variations and realism to their work.
To use this plugin, click the Resources button at the top left navigation, search for Noise on the Plugins tab, and select the plugin to launch it. You can then adjust the settings to choose the size, colour, smoothness, depth, etc. After setting your preferred choice, click the plus icon to add Noise to your design. Try plugin
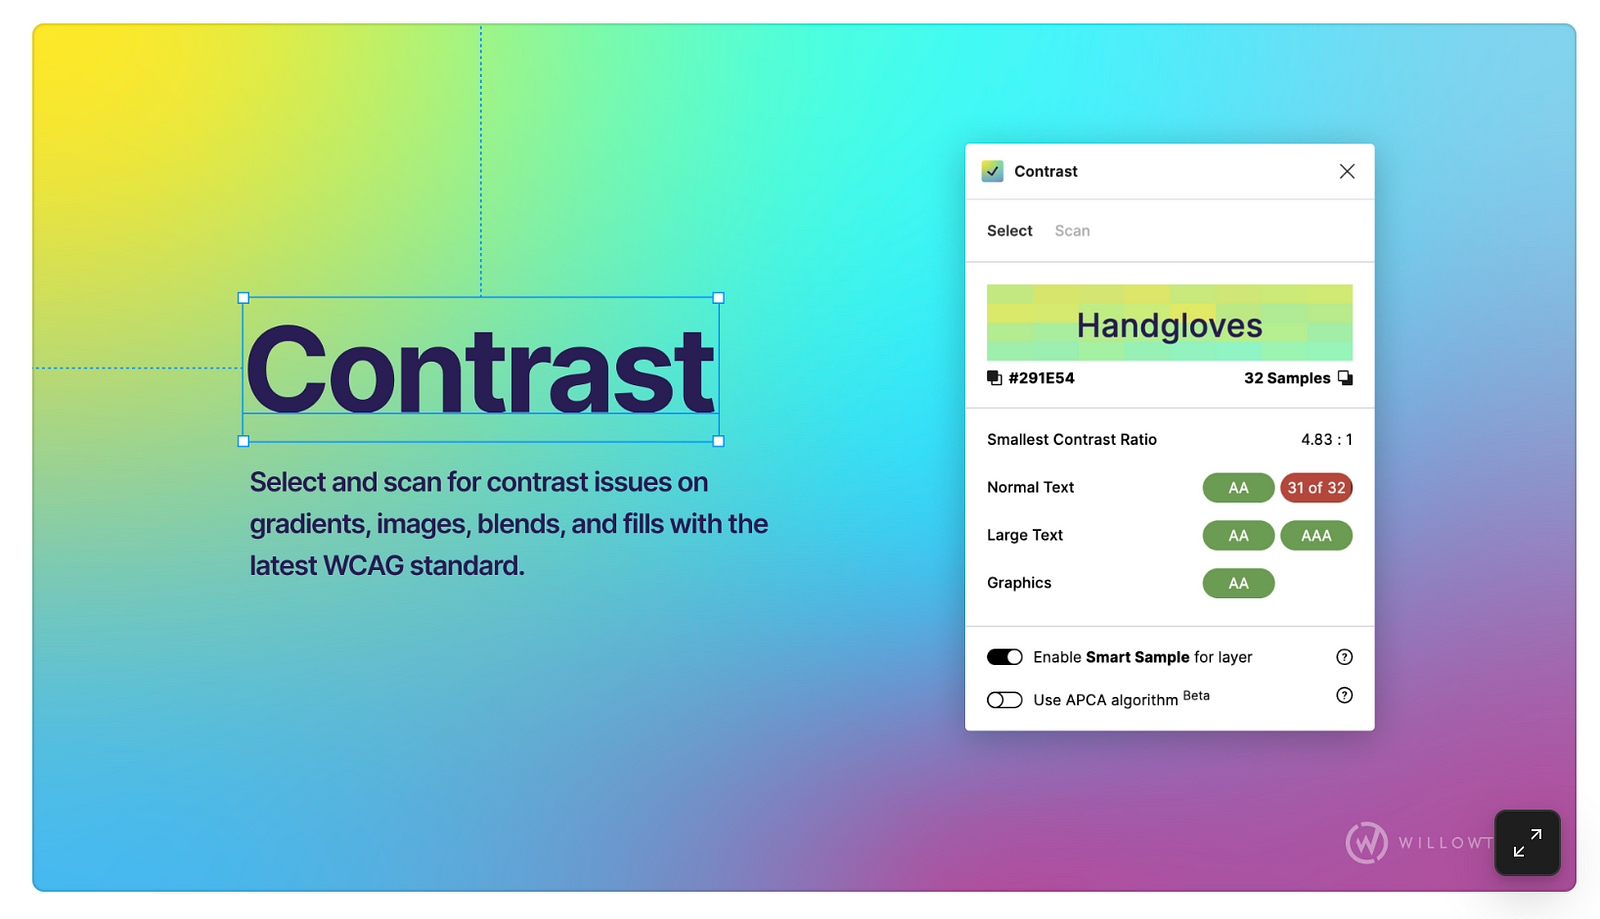
Contrast: The contrast plugin created by WillowTree makes it easier for designers to check the contrast ratios of text elements on their design, ensuring that it complies with WCAG (Web Content Accessibility Guidelines) standards. To use this plugin, launch the plugin, select a layer, and the contrast will bring up the contrast ratio along with passing and failing levels of WCAG. Try Plugin
To conclude, these must-have Figma plugins can significantly improve your design workflow. Have you tried any of the plugins mentioned? Or do you have favourites that were not part of the list?
Share your experience and recommendations in the comment section.